Category: Appliances Devices

  • The Best Way to Pit an Avocado

    Here is the best way, hands down (and hands safe!) to pit an avocado. Oh, sure, we know all the tips and ways that others remove the pit from their avocados, but our way is truly the best way to remove that seed – it’s fast, it’s easy, it’s safe, and it leaves the rest of the avocado intact.

    Some people will tell you to split the avocado in half, and then drive a knife into the seed, using the knife to twist the pit out of the avocado. This not only isn’t very safe, but will sometimes lead to the pit splitting, but still embedded in the avocado.

    Others will tell you to take it out with a spoon, or to squeeze it out. These methods do work, but they are messy, and often result in sacrificing part of the avocado flesh.

    Our method has none of these problems, making it not only neat and easy, but also frustration free.

    Here’s how to do it. You will need:

    Avocado
    Progressive fruit scoop (see link below)

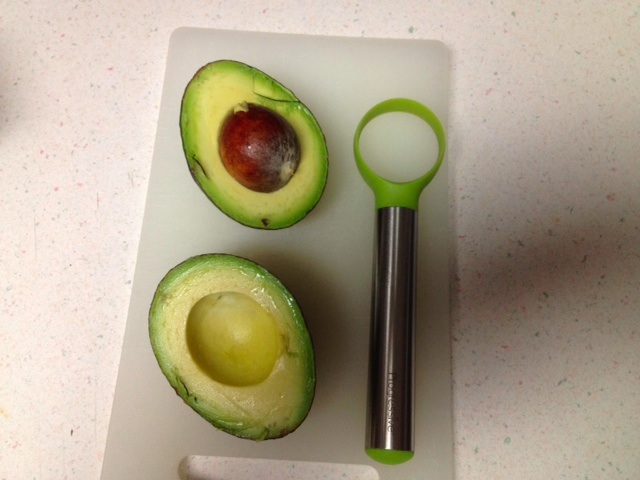
    Split avocado in half…


    avocado-pit-1


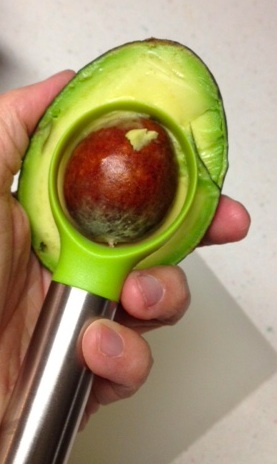
    …and gently glide the fruit loop under the pit.


    pit-avocado-2


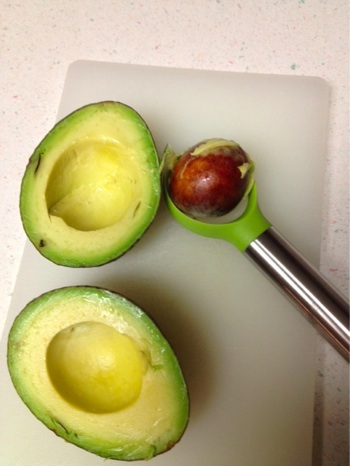
    And there you have it. A perfectly pitted avocado.


    pitted-avocado


    You can buy a set of 3 fruit loops (3 different sizes) for just $11.00 on Amazon:

    Buy Progressive International 3 Piece Fruit Scoops Set on Amazon

  • My Nifty New Personal Blender

    After reading Ani Phyo’s rave reviews of the Tribest Personal Blender I just had to try it. So I ordered one from Amazon. And WOW am I glad that I did!

    The Tribest Personal Blender quickly replaced my Cuisinart personal food processor, and that’s saying a lot, because Cuisinart makes an excellent product!

    The Personal Blender is one of those breed of food choppers / grinders / blenders that has blending containers onto which you screw the blade base as if it were the top of the container, and then you invert it and set it into the motor base.

    What makes the Tribest Personal Blender really cool is not just its power (a’plenty) and versatility (ditto), but the great accessories that were clearly developed by someone who was a power user themselves. For example, the blender comes with a commuter cup lid (like a sippy cup) so that you can blend up a single serving smoothie, swap the commuter lid for the blade base, and take it with you. In fact, that’s just what we do most mornings now – throw some fruit in the container, cover with coconut water – sometimes add some chia powder or almond butter – and blend for a few moments – done! So yummy, and so good for you!

    [Try my Cranberry Apple Crisp Smoothie that I made in my Tribest Personal Blender!]

    But Tribest didn’t stop with their nifty commuter lid – oh no – they also have a grinding blade base (so you can grind your own nuts, coffee, spices, grains, what-have-you) and there is a mason jar adapter, so that you can blend directly in the mason jar and then store what you’ve blended or ground!

    They even have a carrying case, so that you can truly put the “personal” in Personal Blender, taking it with you wherever you go so that you can live the raw lifestyle on the go! In fact, that’s one of the things that Ani Phyo raves about – she really does take her Personal Blender with her!

    personal-blender-case

    I got the full set (you can buy it with just the blending base and containers, or with the grinder base and containers include – it’s only $10.00 more to get both the blending and grinding base) and I’m so glad that I did!

    You can buy the Tribest Personal Blender here at Amazon, where it is eligible for free Prime shipping.

    And you can check out Ani Phyo’s awesome raw food books here.

    tribest-personal-blender-full

  • How to Assemble a Samson Juicer – the Video

    This video is part 3 of our 3-part series, How to Disassemble, Clean, and Assemble Your Samson Juicer. These easy to follow short videos show you how to take apart your Samson Juicer, how to easily clean your Samson Juicer in under 5 minutes, and how to put your Samson Juicer back together!

    For more info on the Samson Juicer click the picture:

    Samson Ultra Electric Twin Gear Wheatgrass Juicer - Perfect Juice Machine for Juicing Fruits, Vegetables, Wheat Grass, Barley Grass & More.

  • How to Clean a Samson Juicer – the Video

    This video is part 2 of our 3-part series, How to Disassemble, Clean, and Assemble Your Samson Juicer. These easy to follow short videos show you how to take apart your Samson Juicer, how to easily clean your Samson Juicer in under 5 minutes, and how to put your Samson Juicer back together!

    These items were used in this video (click on pictures for more information):

    Club1 Nail Scrub Brush

    GILLETTE CO BRAUN DIV #D4010 HS Osc Toothbrush

    MIU France PE Flexible Cutting Board, 3 pack

    Samson Ultra Electric Twin Gear Wheatgrass Juicer - Perfect Juice Machine for Juicing Fruits, Vegetables, Wheat Grass, Barley Grass & More.

  • How to Disassemble a Samson Juicer – the Video

    I couldn’t find any decent instructions for how to disassemble, clean, and assemble our Samson Juicer – so I made some!

    Here’s the video for how to take apart the Samson Juicer for cleaning. The videos for how to clean the Samson Juicer and how to assemble the Samson Juicer will be up on the site soon.

    For more info about the Samson Juicer, click the picture:

    Samson Ultra Electric Twin Gear Wheatgrass Juicer - Perfect Juice Machine for Juicing Fruits, Vegetables, Wheat Grass, Barley Grass & More.

  • How to Clean Teflex Sheets

    Cleaning Teflex sheets isn’t hard, but it can be unwieldy. Here is a tip to clean Teflex sheets easily, and with minimum of fuss!

    I was in a store a few days ago, and I happened to notice a box, 14″ x 14″, made to hold scrapbooking paper. It was about 4 inches deep, with a hinged lid. Nearly perfect for holding Teflex sheets.

    I bought the box, and ran home with it. I laid my Teflex sheets in the bottom of the box, and filled it with hot, soapy water. Then I left the Teflex sheets soak for a while, while I did some other things.

    When I came back to the box, I opened the lid, which opened all the way out and became a work surface for scrubbing the Teflex sheets! (Not that they really need scrubbing – wiping will usually do.)

    It was incredibly easy to put the box next to the sink, remove a sheet from the soapy water, slide it onto the opened lid, give it a scrub, and rinse it in the sink!

    See?:

    And where do you put your Teflex sheets to dry?

    Why, on the racks in your dehydrator, of course!

    The only thing which would make this more perfect would be if I could find a box which was 14.5″ x 14.5″, just to allow a tiny bit more room.

  • Our Samson Ultra Juicer – a Review

    Even though I was aware of Samson Juicers (heck, Samson Juicers are some of the finest available, and the Samson Ultra reviews are glowing), for the longest time I put off getting a dedicated juicer. Why, I reasoned, with my wonderful Vitamix, would I need or get a stand-alone juicer?

    And, let’s face it, the Samson Ultra, the one I would want, is not cheap. It’s not for everybody.

    But then two events conspired to land a Samson Ultra Juicer in my lap. The first was that a friend of ours offered us a huge amount of concord grapes, fresh from her garden. Concord grapes with seeds, which meant that they weren’t likely to get eaten up very quickly, and we couldn’t just plop them into the VitaMix to juice them.

    That lead me to lament how we didn’t have that Samson Ultra Juicer, and on a lark I checked eBay, and just happened to find someone selling one that had been used only once, and she was letting it go for a song. I mean, it was a good price. So I bought it.

    And am I glad that I did!

    This thing could juice a Chevy!

    Twin gear juicers have a reputation for making some of the best juice, and being the most difficult to clean. The Samson Ultra is actually surprisingly easy to clean (at least relatively speaking), in large part because it comes apart so easily.

    That said, I’m going to let you in on a little secret. Even though the Samson comes with a cleaning brush, buy one of these:

    Club1 Nail Scrub Brush

    Actually buy a few of them, they’re only .50 each!

    These soft nail brushes will make cleaning your Samson twin gear juicer a snap!

    Anyways, I know that what you really want to know about is the juice.

    Oh, the juice!

    The first thing I tried juicing was an apple. The juice was fantastic! It was like the wonderful cider I remember from back east, rather than the thin, clear stuff kids drink nowadays.

    The Samson Ultra Juicer also makes nut butter, grinds nuts, and does a bunch of other things. So I next ground up some pecans (I didn’t turn them into nut butter, but that’s next!) It’s amazing how easily and quickly the Samson grinds nuts!

    And then, the grapes arrived. Being able to juice all those grapes, seeds and all, just tossing them into the juicer, was a treat.

    I now have 2 quarts of fresh pressed concord grape juice in my fridge, and it is fanastic! I also have two trays of concord grape fruit leather going in the dehydrator.

    I am so very glad that I got this juicer!

    Oh, I’ll still use my VitaMix to make whole juice, but there is definately a place in my heart – and a spot on my counter – for our new Samson Ultra Juicer.

  • Bagged Organic Baby Carrots and a Vita-Mix: A Match Made in Raw Food, Juicing Heaven!

    If you have a Vita-Mix and are short on time – or just dipping your toe in the water of juicing – then those bagged, prewashed organic baby carrots are just the thing!

    It is so incredibly easy to make delicious, nutritious whole juice with these babies!

    Just throw about a cup of the baby carrots into your Vita-Mix, add 1/2 to 1 cup water (depending on your taste) and blend at high speed for 20-30 seconds, until everything is liquified!

    If you prefer combination juices, to the above start adding anything which strikes your fancy! Some of my favourite juices include any (or all!) of the following added to the above: one apple cut in quarters, one orange peeled and quartered, or one-quarter to one-half inch of fresh ginger.

    You can also add some ice cubes in place of some of the water, which makes for a somewhat thicker, and colder, drink.

    Finally, when you are done with your juice, don’t forget to put a cup or so of water and a few drops of dish soap in your Vita-Mix and blend it at high speed for a few moments. It’s a simple way to get your Vita-Mix easily cleaned down to the bottom of the blades!

  • The Best Way to Cut Open a Young Coconut

    As anyone who has perused raw food websites, raw food cookbooks, or raw food books for more than about 5 minutes knows. young coconuts (mostly marketed as “young Thai coconuts”) are a fantastic source of all kinds of healthful goodness, and not only are they great for you, but they taste great as well. The liquid inside them, known as “coconut water” (as compared to the thick milky stuff you get with older coconuts) is incredibly good for you, low in calories, and tastes divine.

    And the tender meat of a young coconut..only 1/4 to 1/2 inch thick, and almost like Jello in consistency. It tastes fantastic, and is the basis for all sorts of yummy recipes, both main dish and dessert (like Annie’s Tropical Mousse).

    You’ve probably seen them in the produce aisle, and maybe not even realized what they were, as they don’t look like the coconuts you are used to. That is because they are still covered with their outer fiber – the shell you are used to seeing is encased within that fiber, with the tender meat and coconut water housed within the still-thin shell.

    Usually the fiber housing has been shaped, and so the young coconut looks something like this:

    With all the great nutrition, taste, and versatility packed into one young coconut, they are a bargain at the $2.00 to $3.00 they cost.

    But opening them is nearly as difficult as opening a more mature coconut, and because they are so wonderful, you will want to do that much more frequently than you probably open mature coconuts.

    But it doesn’t have to be difficult.

    Here’s how to open them, and it’s quite simple:

    First, you need to have a nice big heavy cleaver. Not the thin-as-a-razor kind you can get in so many shops, but a big meat cleaver meant for hacking through bones – one with plenty of heft. Henckels has a fantastic one that I use, and I’ll show it to you in a bit.

    Now, put that coconut on a cutting board, on it’s side, and give it a really good whack with the cleaver, straight down into one of the slopes which leads to the point at the top of the coconut.

    Hopefully that whack broke through into the inner shell enough so that you can now turn the coconut upside down over a bowl, and let it rest and drain out all the wonderful coconut water. (If it didn’t, give it another good whack, and another if necessary, until you can drain out the water.)

    A small young coconut can contain as much as 1 1/2 cups or more of coconut water.

    Once all of the coconut water is drained out, if you have the right cleaver for the job, like my Henckels, you can turn the coconut back on its side, insert the cleaver back into the slit you made, and actually just work the cleaver down, straight across the top of the coconut, neatly slicing off the tip, and opening up the coconut straight across – it will now look like a cup (in fact many Asian restaurants do exactly this, serving a coconut-based drink in this ‘cup’).

    Inside the coconut, along the walls of the shell, you will see the tender young coconut meat. The best way to get this out is to take a rubber scraping spatula, and gently pry and scrape the meat away from the sides. Try to keep the pieces as large as possible, because lots of recipes call for cutting the meat into strips, and using it like a pasta.

    But even if you can’t extract it in larger pieces, it’s wonderful for all kinds of recipes, including my Tropical Mousse.

    This is the Henckels cleaver I have (click on the picture for full info, including pricing from Amazon):

    Henckels International Classic Stainless Steel Meat Cleaver

  • Teflex Dehydrator Sheets: Tips for Handling and Storage

    Teflex sheets are a wonderful thing, and open up a world of possibilities for things you can make with your dehydrator, such as crackers and flatbreads, and the delicious ‘sauteed’ mushrooms in the dehydrator.

    Here are some hints for cleaning, drying, and storing them:

    1. Wash with mild soapy water, and rinse them. Then, to dry them you can either:

    a) Hang them from one of those magnetic clips which are so popular these days, stuck onto the side of some nearby appliance; or

    b) Simply put each one on a rack in your dehydrator!

    To store your Teflex sheets you can (more…)